Prolific Adornments - With Age Comes Beauty

Prolific- profusely productive or fruitful Adornments-ornamentation; embellishment
Showing posts with label in the works. Show all posts

Wednesday, December 8, 2010

New Things and Possibly a New Line of Jewelry

Ahh, I got rid of the puter virus and am back to normal (however normal you could call me) I really haven't been making much lately. I dunno, I just got burnt out and needed a break. Anyways, here are a couple things I made recently.
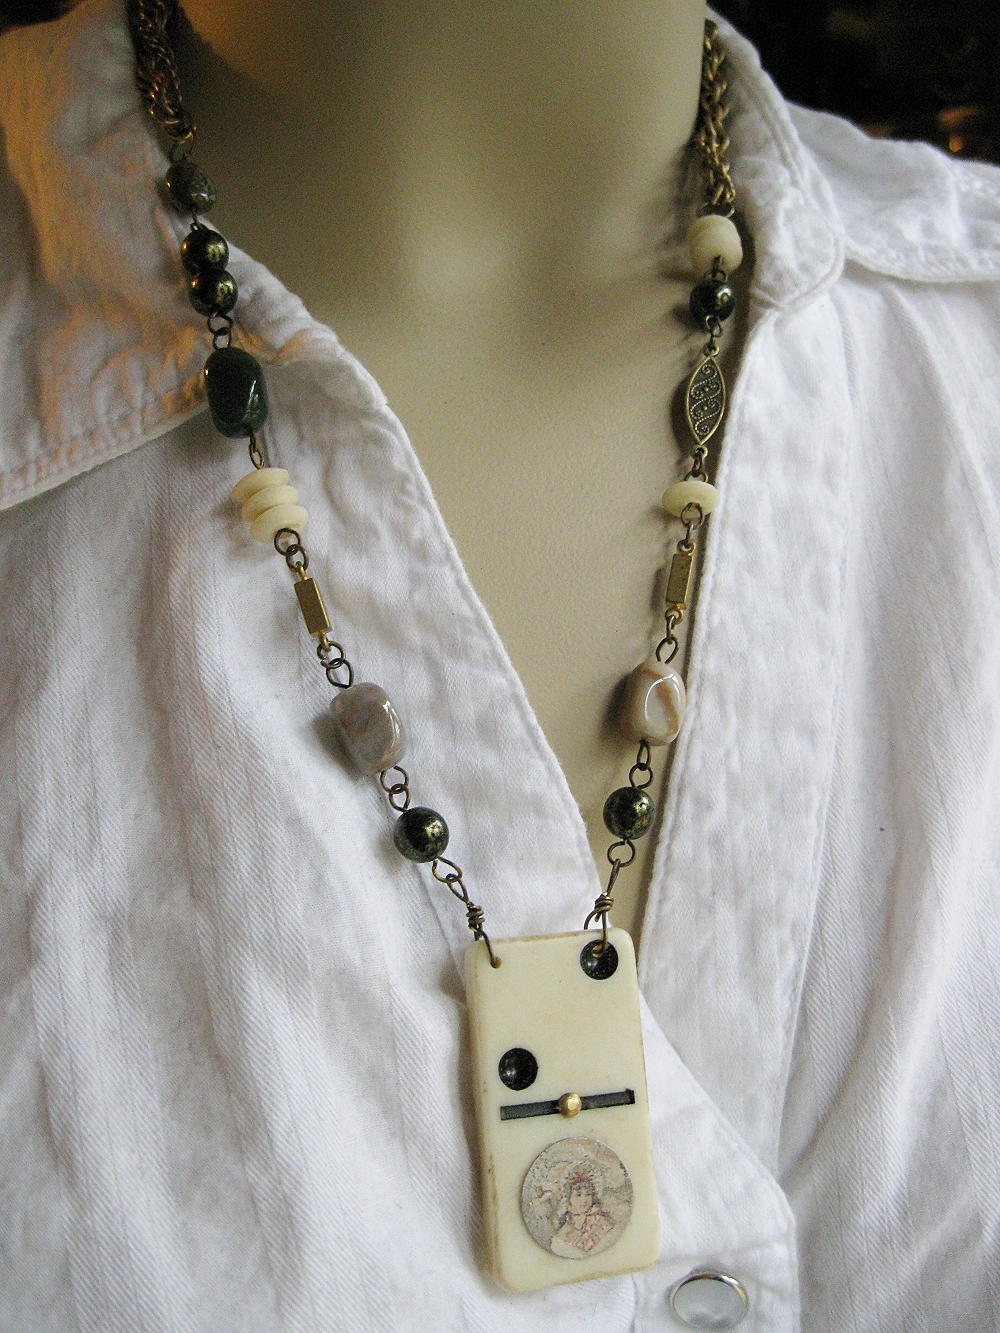
 This necklace started off with a couple things I got at the flea market: the domino, which I roughed up and aged and the little girl disk. It came from the tin lid I got here.


There is, as (almost) always, a lot of recycled components. The girl from the tin, the domino, the white spacer beads and the two lengths of chain. The brass connectors are all vintage, but I don't know for sure if they are used or "new" vintage.


I really like jewelry pieces that "mean" something. The domino piece is a talisman necklace for family. The 2 dots on the domino represent man and woman. The little tin disk represents the child. One meaning of green is harmony... jasper represents help in childbirth- and there is a lot of jasper on this necklace. 

This piece started with a cool wooden cheetah.The cheetah, wooden beads and pearly chain came from the flea market stuff here. The elephant came from more flea market stuff here.


This piece is for getting things done. The cheetah represents intent, focus and making things happen quickly. The elephant is for strength, wisdom and power.  Green again is for harmony. When you are trying to get things done, harmony is certainly helpful!

Blue is representative of inspiration and devotion.

I haven't decided on how to name my new talisman pieces. I will have to think on that. I need to decide soon though so I can get them listed. lol

Thursday, November 18, 2010

New Techniques- Ice Resin

I bought some Ice Resin a couple of months ago, but I have been afraid to play with it. I tend to do that- buy new things but not get around to them for a while.

I bought some old rusty lids which I showed here and thought this would be something fun to use with the resin. 
Here are the results:

For the left one, I left the lid the way it came. I added a dried flower and some text. For the one on the right, I first used a patina on it to make it almost black. Then I added a flatter dried flower and text.

I mixed the minimum amount of ice resin suggested, (1/4 oz each of part A and part B) let it sit for 5 minutes, then drizzled it over the lids. I had a LOT of resin left, so I half filled some frames which I sell in my bead shop. I still had a lot left so I grabbed a piece of ephemera paper and coated that too! Note to self and others trying resin for the first time: Always have plenty of things prepared to use resin on. You won't believe how far that stuff goes!

I am very pleased at how the pieces came out. Of course you have to allow it to cure for 3 days, but you can work with the pieces (carefully) after 6 hours.  Although things went pretty much faultless, there are a few things I learned in my first experience with Ice Resin.

1. Always have plenty of things ready to coat/fill with resin. I would rather have too many things prepared than to waste unused resin.

2. Always stick loose pieces down. I thought that pouring the resin on the flowers and text would hold them down. Wrong. They tried numerous times to float up on me and I had to use toothpicks to keep pushing them back down.

3. Watch for bugs. Wait, what? Yeah. I had put my Ott lamps over the pieces for a little while after I poured them so that it would help with raising bubbles to the top. I went out of the room for a few minutes and when I came back, a skeeter hawk (dunno if that is their real name but that's what we call them in the South) had landed on the piece of paper. (Guess he was attracted to the light and the paper was like 9 inches below it.) He had gotten into the house earlier last night but was in my living room which has a vaulted ceiling, so I could not get him out. I didn't even know he had made it to my studio/office.  Man that was NOT fun, pulling him out of the resin. I am terrified of bugs. My hubby said I should have just left him there but I don't care to sell resin coated bugs. lol

4. If you do add pressed real flowers as I did, you may want to coat them with mod podge or something before using them. I knew that the resin would make the paper more transparent, but it also really made the flatter flower very transparent. I wish I had coated it. The thicker flower turned out great!

5. Watch videos and read tips online. There are a lot of resin videos out there on the web. After watching a few, I felt confident that I too could use resin! It really is easy and fun!

I can't wait to make some cool jewelry out of the pieces I made :D

Sunday, November 7, 2010

Weekend Work So Far

My daughter and her kids are out of town for the weekend, so I've been trying to get some work done. I babysit for my daughter when she works nights.

I've been having fun making grungy looking stuff. It really is what I love. I have made a lot of "pretty things" for my Designs By Debi shop, (the pearly earrings in the pic are prolly going in that shop) but for myself, I love grunge. When I opened Prolific Adornments, I told myself that this shop would be where I could do whatever I pleased. And grunge pleases me! lol

I used to only grunge up copper or brass or sterling, since liver of sulfur works great on those metals.Since most of my junk stash is old costume jewelry, most of it is plated. I've been experimenting with different methods of grunging it up. Normal patina methods don't work on those items and what works on one type of finish doesn't work on another.  I also wanted to get a texture to the pieces, not just a color change.

I would love to be a fly on the wall in Fanciful Devices' studio. She has it all down pat. She creates the most awesome grungy items! But that's ok, I am slowly figuring things out on my own. It's nice to have your own methods anyway. Makes you feel accomplished or some crap like that.

I'm working on some more glass slide pendants also. Honestly, the insect one in my shop now is my first! Previously, my soldering was always with metals and a torch. I'm new to this whole solder iron thing. It is fun! It's also nice to solder without bringing out the bottles of fuel and oxygen, solder bricks, torch parts, fire extinguisher, etc, etc,... and the big flames. lol

These pendants haven't been soldered yet, just copper tape wrapped. I have a lot of ephemera type papers in my scrapbooking stash, so it's nice to finally use them since I haven't been scrappin' in such a long time.  A lot of the things I previously bought when I was living and breathing scrap booking almost 24/7 are things I can use in jewelry! (now that I am living and breathing it almost 24/7)  Yay!

Friday, October 22, 2010

T.G.I.F!!!!!!!!!!!! or not

I know everyone always says TGIF and things like that, but I don't really get it. For people who work a 9-5 M-F work week, the weekend is exciting. Not so much for those who run online businesses. You can't put up a closed sign and lock the door. Well I guess you could put your shop on vacation for the weekend, but you would risk losing those weekend sales. Also, you still get emails or convos from customers and have to provide customer service during the weekend. So really, there is no excitement for the weekend for me. Well, except for creating new stuff! Now that's fun... I mean work...I mean fun... ehhh whatever.

Totally loving this necklace. I created the slide pendant last night and worked on the design and creation today. I always get frustrated trying to find the perfect bead caps, so I created my own. I twisted recycled Sari Silk for the top of the necklace.  Again, sorry for the bad pic, but I took it on my work surface. I hope to get this necklace in my shop tomorrow. :)

For those that actually get a the weekend off- TGIF! And for the rest of us... Have a Happy, Productive Weekend! :)

Thursday Night Playing... I mean work *grin*

 Tonight I worked on some components for soon to be pieces in my shop. I created a few microscope slides. The England one is for me. This wasn't on purpose. I ummmm... accidentally forgot to back it, so its just blank on the back. Shame Shame. Who knows, maybe I can make it work anyway.  Sorry for the crappy pics. I took them on my work bench.

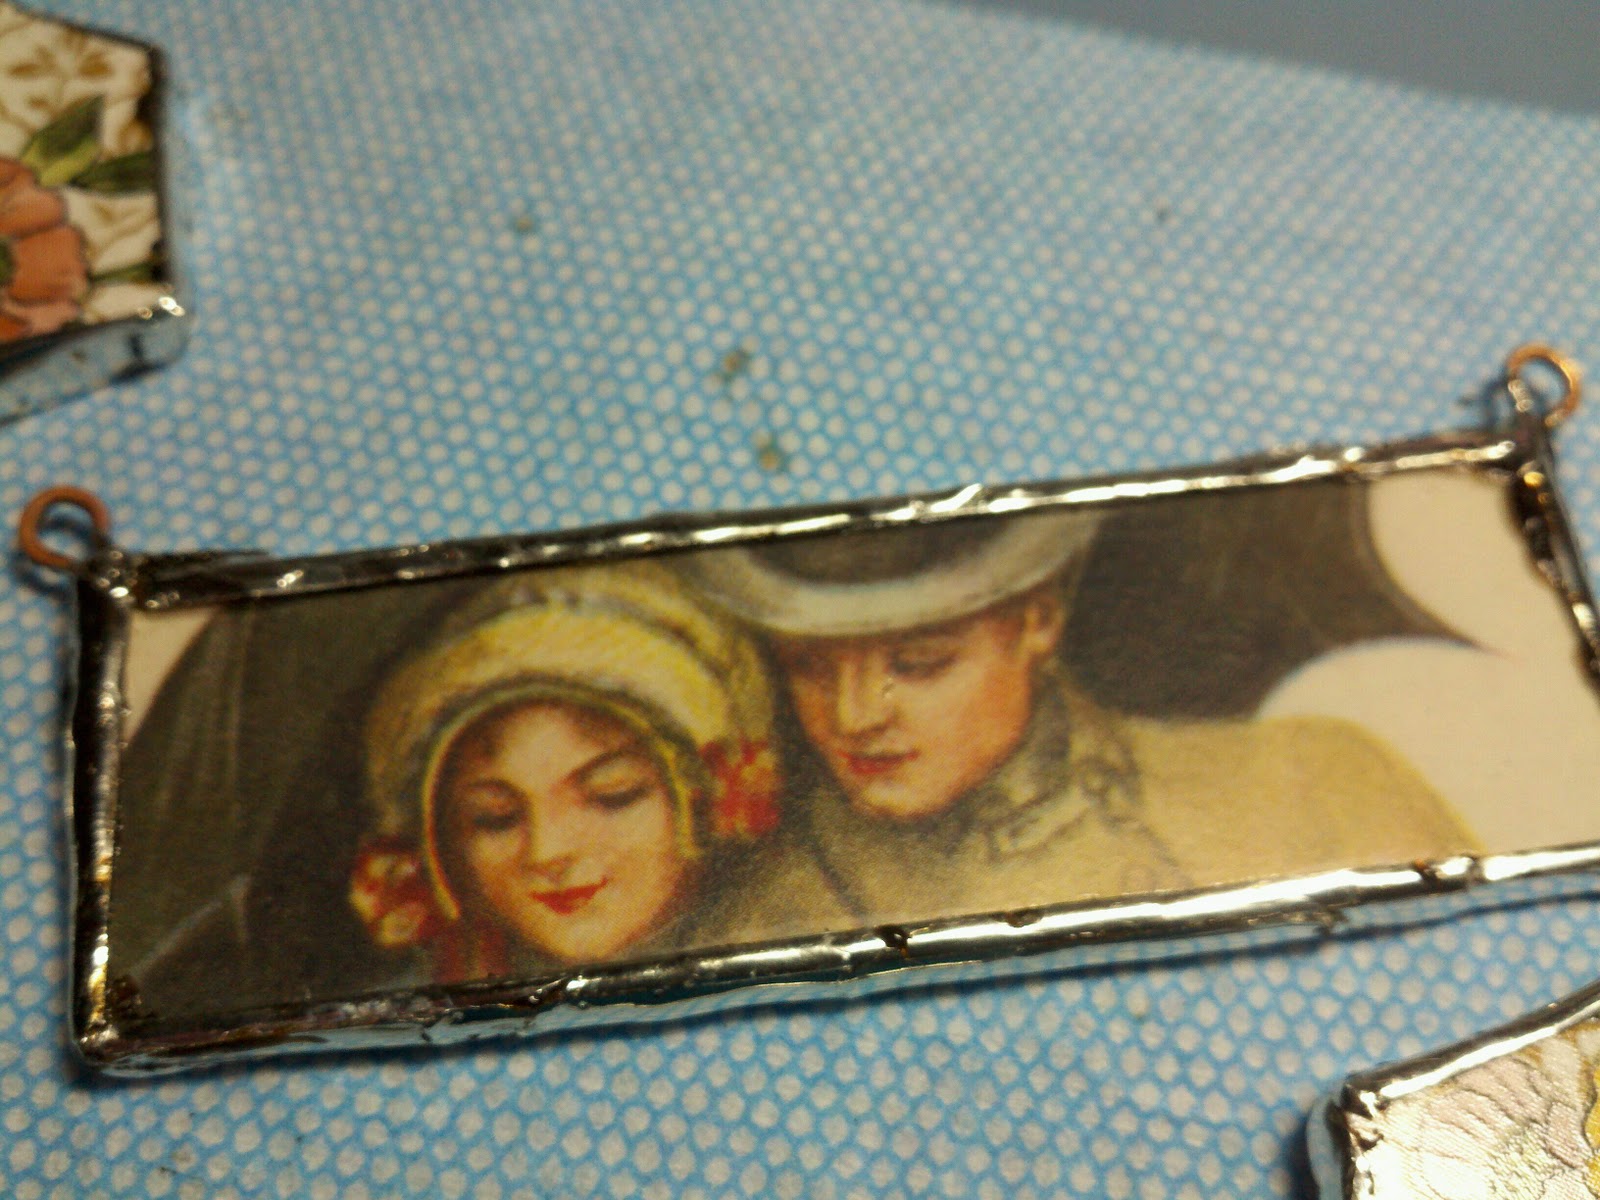
Here are the almost finished pieces.  The little pieces with the flowers on them, top left and middle right, are ....mosaic tile pieces! I saw them while shopping today and thought, hmmmm, I bet I could solder those and make some cool ass pendants! I didn't attach jump rings to them yet though. I'm not sure how I am going to use them, so I will attach rings later. 

   
I love this one! It's gonna be hard to part with it. One side has this lovely couple under an umbrella.
 The other side has this lovely text. "Hints to the Bashful Lover - Take her walking in the rain. How adorable is that? Of course if you knew how much I love rain, you would understand why I love it so much. I LOVE rain, thunder, lightning... storms!
 I still have to clean these up and grunge them up. These are too special to make "pretty" jewelry out of!